
1. Installation
1.1 Okay Dynamics Engine
- Start with an empty Unity 3D Core project
- Tick Allow unsafe code in Project Settings/Player/Other Settings menu.
- Import the package using the Package Manager. Let Unity install or upgrade dependencies.
- Copy files from Assets/Okay/ProjectSettings folder to ProjectSettings folder.
1.2 TextMesh Pro
- Import TMP Essential Resources using Window/TextMeshPro/Import TMP Essential Resources menu option.
- Import TMP Examples & Extras using Window/TextMeshPro/Import TMP Examples & Extras menu option.
2. Components
The Unity scene should contain an ODE Engine GameObject (GameObject with an ODE Engine attached).
Then, in order for a GameObject in the scene to be part of the simulation, the following behaviours should be attached:
2.1 Unity Engine Collider and Rigidbody
These are used for first pass collision detection, to detect that two GameObjects are potentially colliding. ODE Collider will automatically set the Unity Engine Collider to trigger and the Unity Engine Rigidbody to kinematics.
Rigid bodies:
2.2 ODE Collider
Similar to Unity Engine Collider. This is used to generate detailed collision information.
2.3 ODE Rigidbody
Similar to Unity Engine Rigidbody. Control of an object’s position through ODE physics simulation.
2.4 ODE Mass Behaviour
This behaviour is used to set the mass and moment of inertia of ODE Rigidbody, according to the ODE Collider shape and desired final mass or density.
2.5 ODE Reset Scale
The engine supports scaling and nesting; this allows for example easy creation and attaching of boxes of various sizes.
This behaviour will bake the scale into the Mesh Filter mesh vertices and into the Colliders, then set the scale of the GameObject to {1, 1, 1}.
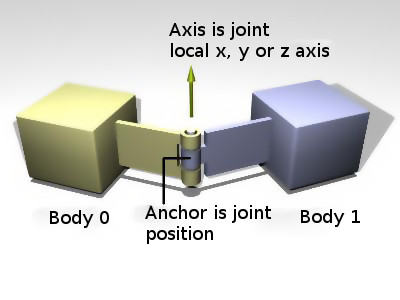
3. ODE Configurable Joint
Similar to UnityEngine Joint; it is a relationship that is enforced between two bodies (or one body and the static environment) so that they can only have certain positions and rotations relative to each other.
This relationship is called a constraint; the words joint and constraint are often used interchangeably.
ODE Configurable Joint can be configured to create for example:
A hinge:
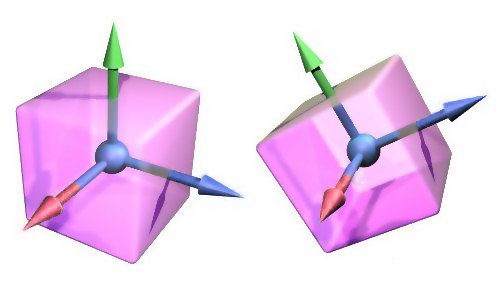
A Ball and socket:
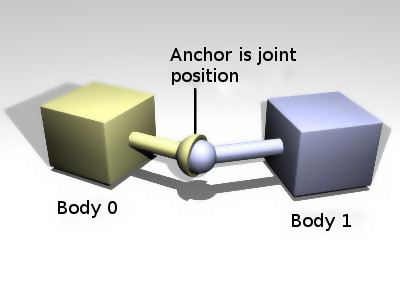
An ODE Configurable Joint behaviour is added to a Joint GameObject and joint parameters such as position and axis are taken from the Transform.
If Body 0 (body zero) is null then it means attached to static environment.
4. Other Components
4.1 ODE Trimesh
It is a triangle mesh collider that uses ODE Trimesh Data as data.
ODE Trimesh Data contains all triangles information. It is a ScriptableObject (belongs to the Unity project, not the scene) and can be used by many instances of ODE Trimesh.
To create an ODE Trimesh Data:
- Select Tools/ODE/Create ODE Trimesh Data
- Assign a Mesh
- Press Create from Mesh button
4.2 ODE Terrain
It is a terrain collider that uses ODE Terrain Data as data.
ODE Terrain Data contains all triangles information. It is a ScriptableObject (belongs to the Unity project, not the scene) and can be used by many instances of ODE Terrain.
To create an ODE Terrain Data:
- Select Tools/ODE/Create ODE Terrain Data
- Assign textures, set parameters
- Press Create buttons
5 Demos
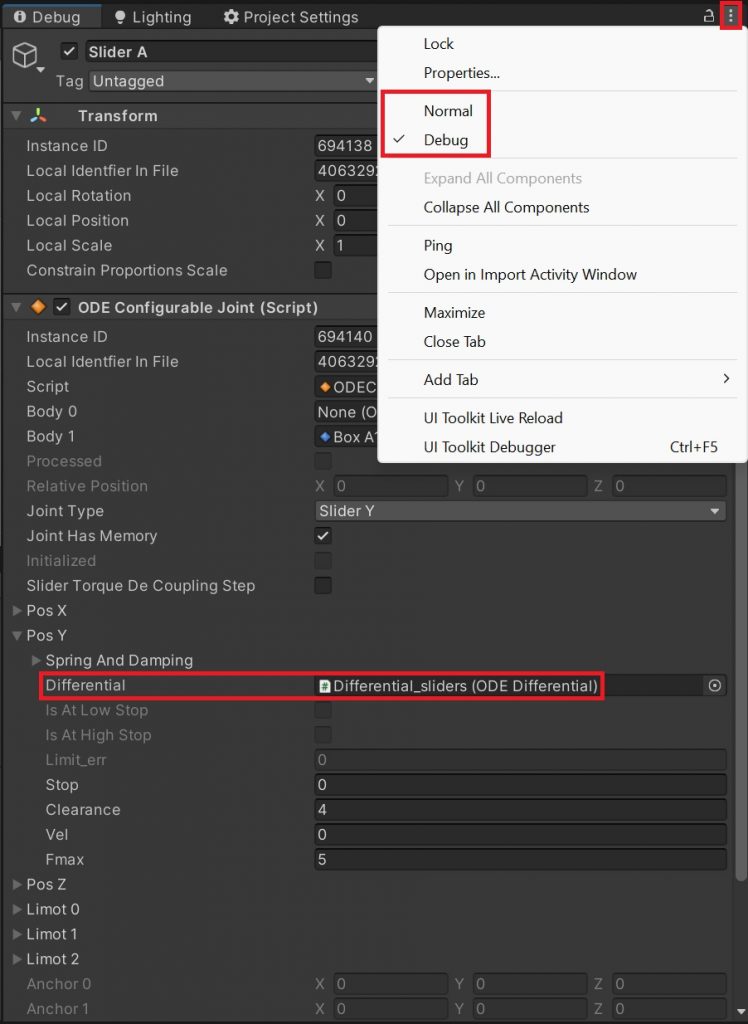
5.1 Demo Differential scene
You will need to switch the inspector from normal to debug view in order to see the differential fields of ODEConfigurableJoint.
5.2 Motocross scene
You will need an XBOX 360 controller (or similar) to control the bike.
5.3 Profile scene
Add OKAY_PROFILING preprocessor definition in Project Settings/Player and enable OkayProfilerUI component to see the profiling information panel.